Installation
Uploading via WordPress Dashboard
- Navigate to the ‘Add New’ in the plugins dashboard
- Navigate to the ‘Upload’ area
- Select wp-scraper-pro.zip from your computer
- Click ‘Install Now’
- Activate the plugin in the Plugin dashboard
Using FTP
- Download wp-scraper-pro.zip
- Extract the wp-scraper-pro.zip directory to your computer
- Upload the wp-scraper-pro directory to the
/wp-content/plugins/directory - Activate the plugin in the Plugin dashboard

Generating URL’s
URL Visual Selector
The visual selector works much in the same way as the Content Selector. The difference is you will only need to select one link to the pages you wish to scrape into your site. The visual selector will then import all similar links into a list for you to use with the multiple scraper.
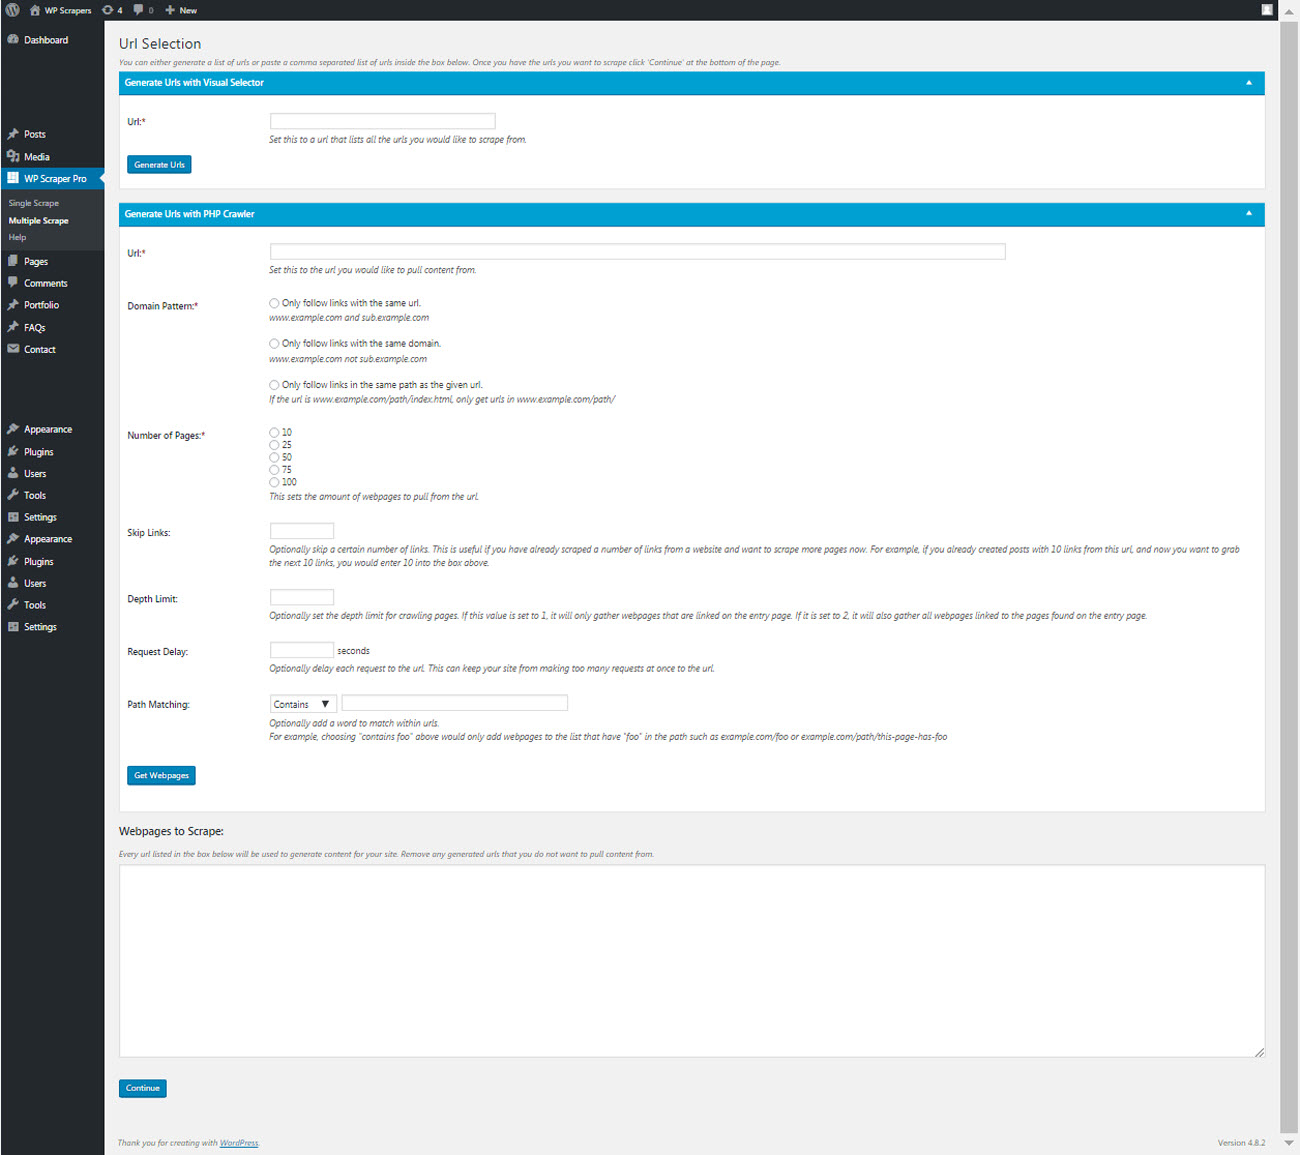
PHP Crawler
Domain Pattern:
Only follow links with the same url. – www.example.com and sub.example.com
Only follow links with the same domain. – www.example.com not sub.example.com
Only follow links in the same path as the given url. – If the url is
www.example.com/path/index.html, only get urls in www.example.com/path/
Number of Pages:
Allowed Options: 10, 25, 50, 75 and 100 – This sets the amount of webpages to pull from the url.
Skip Links:
Optionally skip a certain number of links. This is useful if you have already scraped a number of links from a website and want to scrape more pages now. For example, if you already created posts with 10 links from this url, and now you want to grab the next 10 links, you would enter 10 into the box above.
Depth Limit:
Optionally set the depth limit for crawling pages. If this value is set to 1, it will only gather webpages that are linked on the entry page. If it is set to 2, it will also gather all webpages linked to the pages found on the entry page.
Request Delay: Seconds
Optionally delay each request to the url. This can keep your site from making too many requests at once to the url.
Path Matching: Contains – Ends with
Optionally add a word to match within urls.
For example, choosing “contains foo” above would only add webpages to the list that have “foo” in the path such as example.com/foo or example.com/path/this-page-has-foo
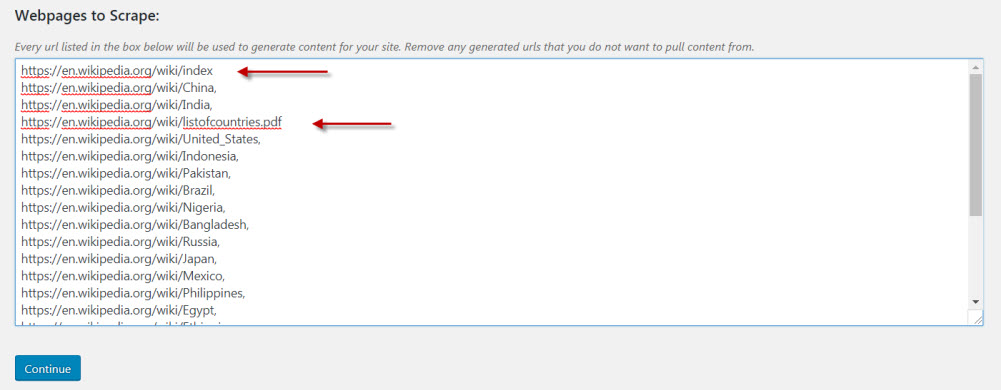
Note: The list of URL’s will vary in quantity and accuracy depending on the site your retrieving them from.
Once you have generated a list, Every url listed in the box below will be used to generate content for your site. Remove any generated urls that you do not want to pull content from.
If the PHP crawler and the visual selector does not meet your needs, we recommend trying Spider: ( free version )
https://www.screamingfrog.co.uk/seo-spider/
Content Selection
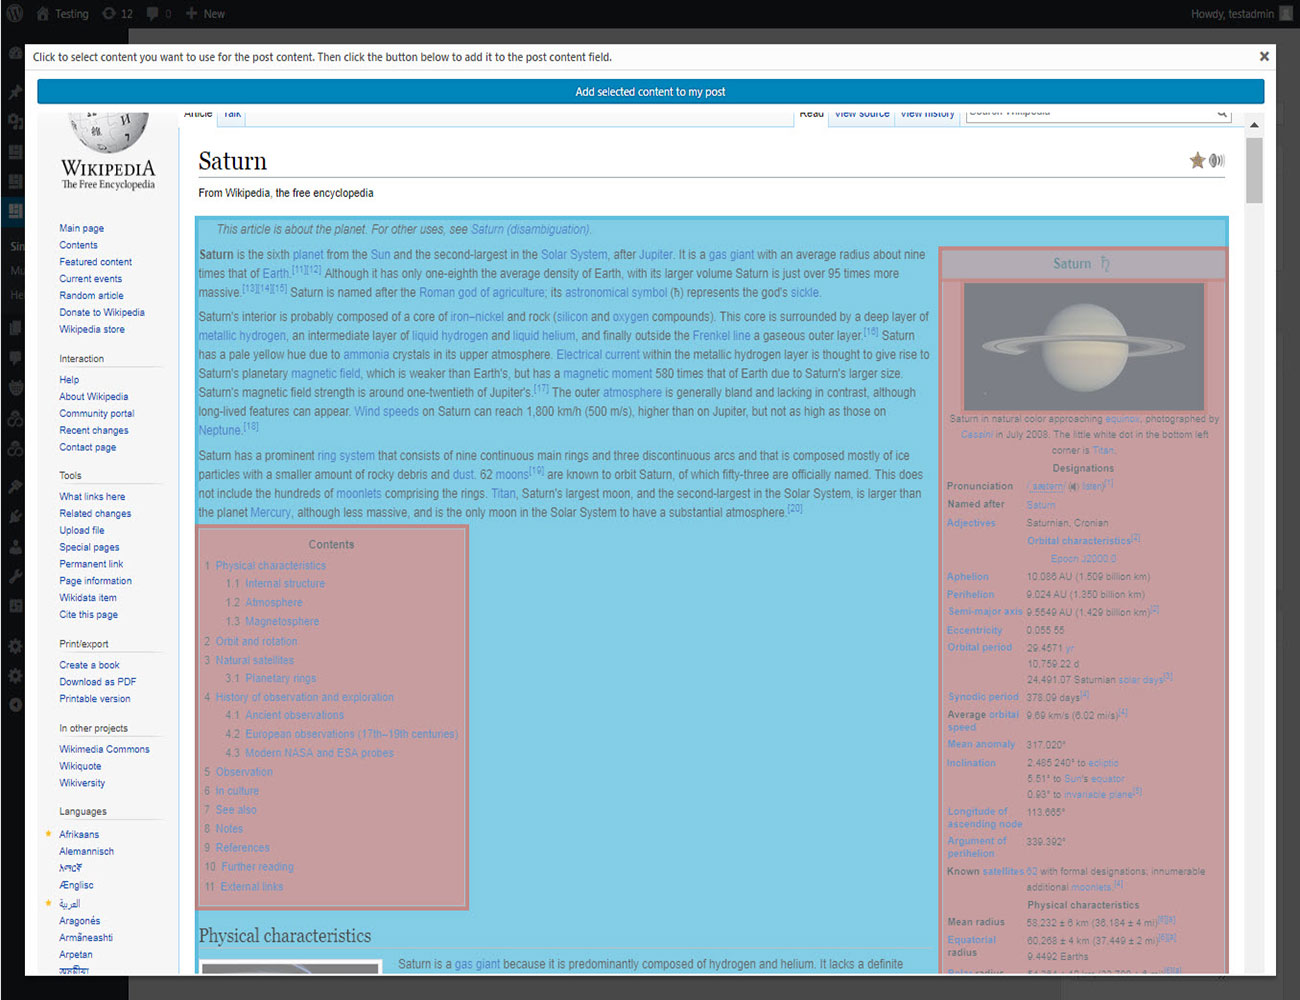
Highlighting And Selection
You may select as much content as you wish by simply clicking to select the blocks of content you want. As your mouse hovers over the page, a blue box will appear to illustrate what content you will get. If there is an area within the blue box that you do not wish to include, simply click it again. A red box will appear inside the blue box to illustrate content that will be excluded.
Add selected content
Hit the add selected content to my post button on top of window and the content will be added to the WP Scraper post editor.
How much should I select
Depending on server resources adding content to your post may take anywhere from a few seconds to a few minutes. The more content you import into your post, the longer scraping will take. If it takes too long to scrape, you could try increasing the “Time Delay Between Scrapes” under Extract Options.
Advanced Content Selection
Selecting the Right Content
If at any time you are having trouble getting the visual selector to choose the right elements from the page, you can manually type in the correct selector into the selection textboxes. These inputs are different from others on the scrape page, and can be distinguished by the red text inside them.
To find the right element, you must have an understanding of HTML and CSS selectors.
On most popular browsers, you can right click and inspect any element on any website. This will bring up the source code for that page, with the element you selected highlighted.
By viewing the source code you can find the id, class, or another selector to use.
Ensure that this selector is unique on the page, meaning if the class of the element is “blue”, be sure there are no other elements on the page using the class “blue” to be sure that you are choosing the right element.
It is often necessary to nest elements to get a truly unique selector. To do this correctly for scraper you will want to use this “>” between each element. You can also use “:eq(n)” to select the nth element that matches. When using “:eq(n)” rememeber that the number “n” starts at 0 not 1.
For example, if you want to select the first h1 inside of the #main div, you would use type this selector into the selection text box: “#main > h1:eq(0)”.
We recommend you use this option with caution, and be sure you understand HTML elements and CSS selectors before attempting to change these fields.


Single Scrape
*URL
Enter the URL you wish to copy content from.
*Title
You may select a title from the source page or add your own.
*Post Content
You may select multiple areas of the source page including images.
Post Type
Post Type: Post, Page – Status: Published, Draft, Pending Review
Options
Only Text and Images – Checked will remove all html elements except p, div, table, list, break, headings, span, and images. CSS will not be included with this option and links and videos are automatically removed.
Remove Links – Checked will remove all external links from the content.
Add source link to the content – Checked will Add source link to the content.
Categories
Select a category or create a new one.
Tags
Select tags from source page or add your own.
Featured Image
Select an image from the source page or add your own.
* Required

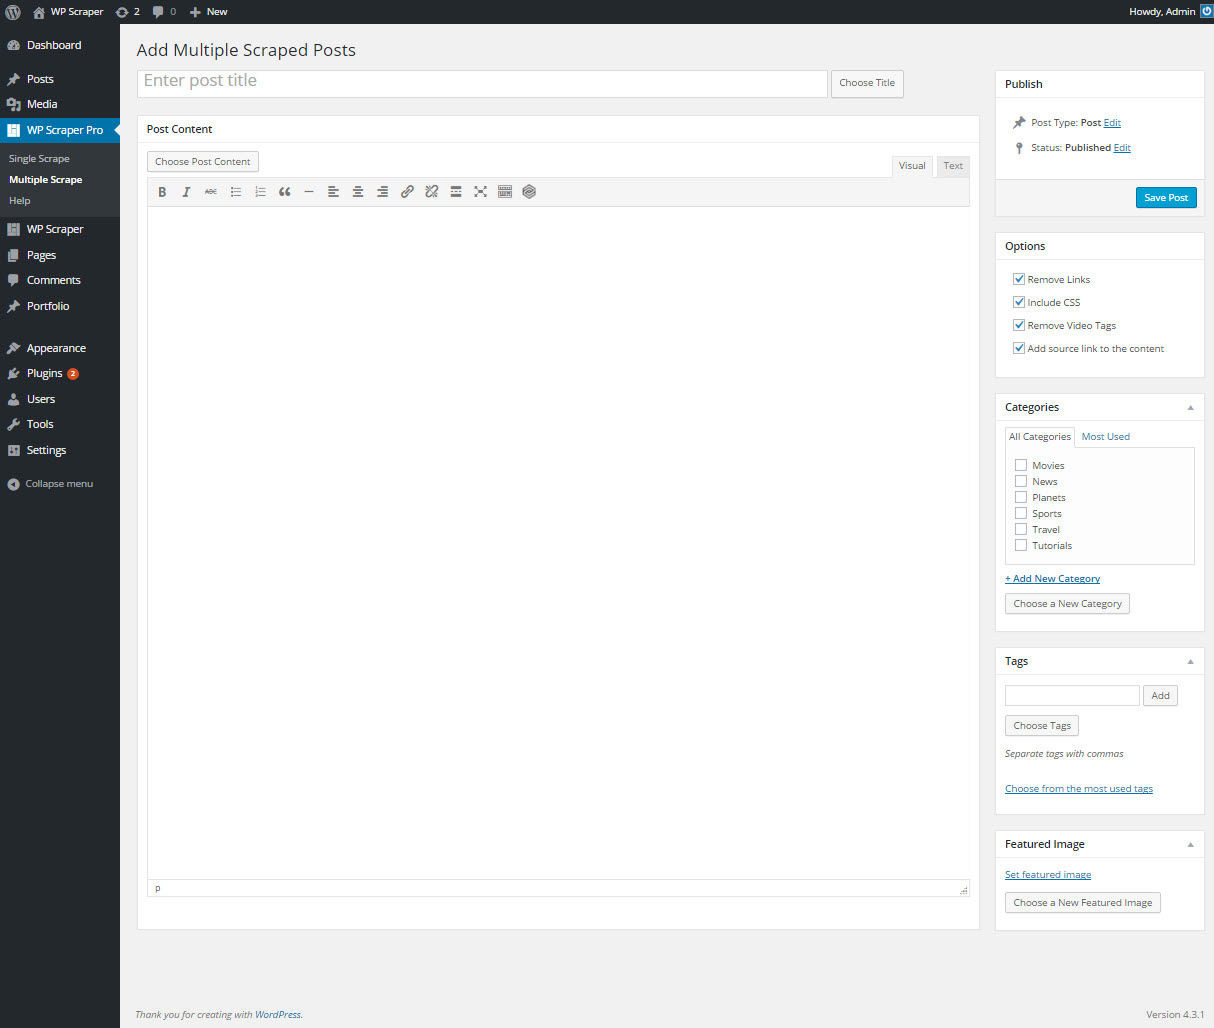
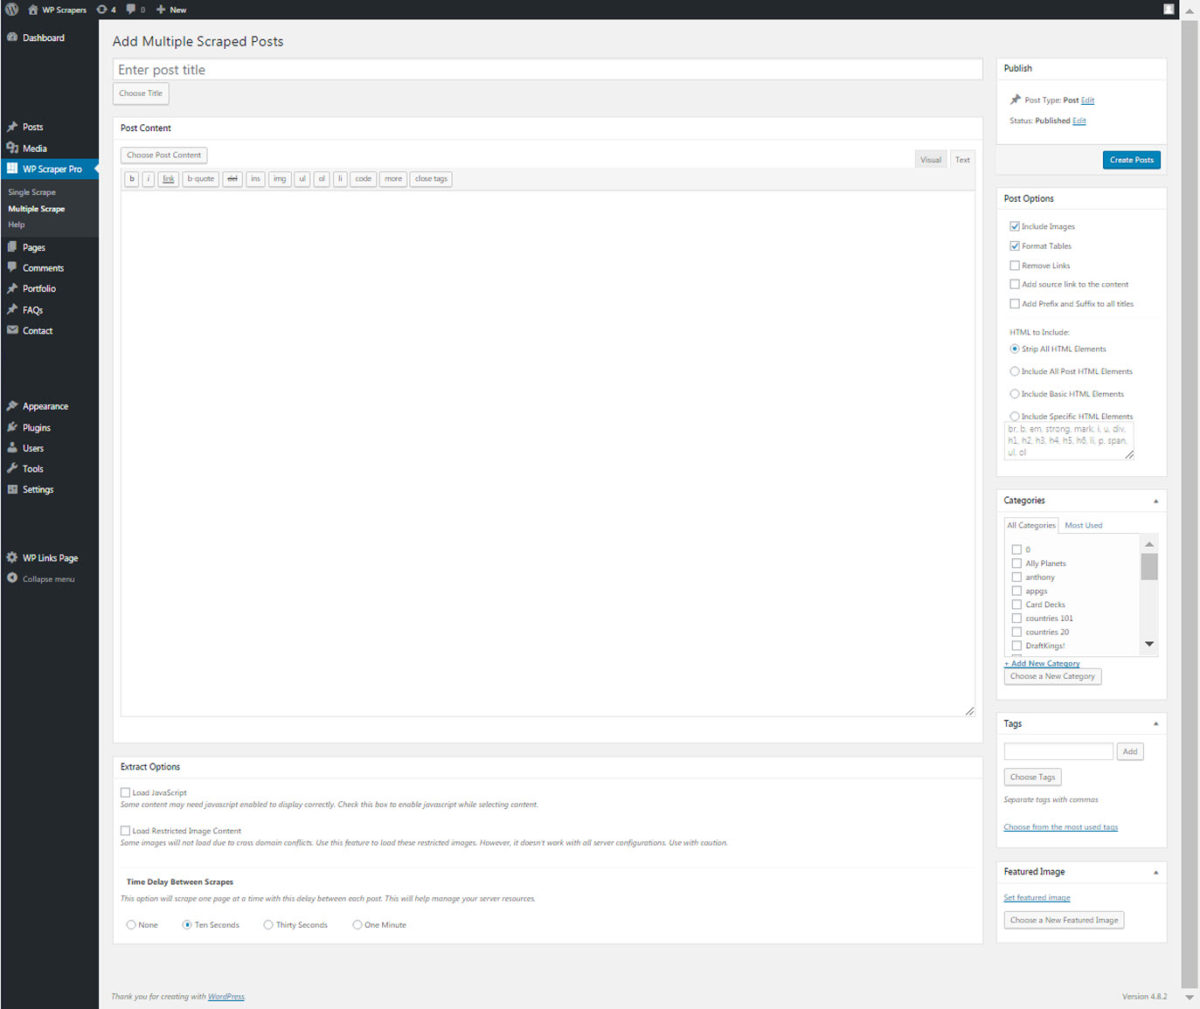
Multiple Scrape
*Titles
Select a title from source page or add your own.
*Post Content
You may select multiple areas of the source page including images.
Post Type
Post Type: Post, Page – Status: Published Draft, Pending Draft
Options – Include Images, Format Tables, Remove Links, Add source link to the content
HTML Options – Strip all HTML, Include Post HTML, Include Basic HTML, or you can specify exactly which HTML to keep in the content
*Categories
Select a category or create a new one.
*Tags
Select tags from source page or add your own.
*Featured Image
Select an image from the source page or add your own.
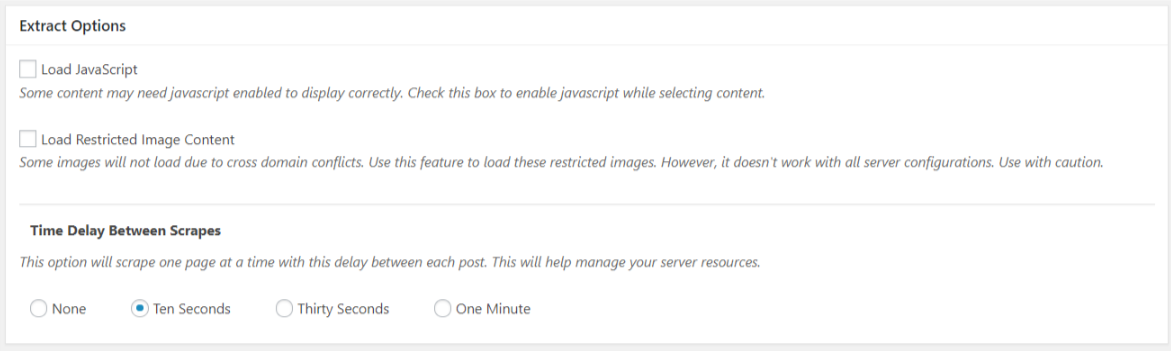
Extract Options
Load JavaScript
Some content may need javascript enabled to display correctly. Check this box to enable javascript while selecting content.
Load Restricted Image Content
Some images will not load due to cross domain conflicts. Use this feature to load these restricted images. However, it doesn’t work with all server configurations. Use with caution.
Time Delay Between Scrapes
This option will scrape one page at a time with this delay between each post. This will help manage your server resources. Choices Include: None, Ten Seconds, Thirty Seconds or One Minute
*If you type in your own content into the multiple scraper fields then the content will be repeated throughout all the posts. If you choose the content from the source page for any of these fields then the scraper will find and add the content to each post.
WP Scraper Results
The results of the scraper will be shown in real time as posts are created. Please remain on this page until all of your posts are created or it will interrupt the scraping process. Each post will display as soon as it is made. You can view or edit any of the new posts from this screen by simply clicking the provided links. When scraping is complete the progress bar will be removed and a message will be displayed showing that the process is now complete. After completion you are free to navigate from the page.
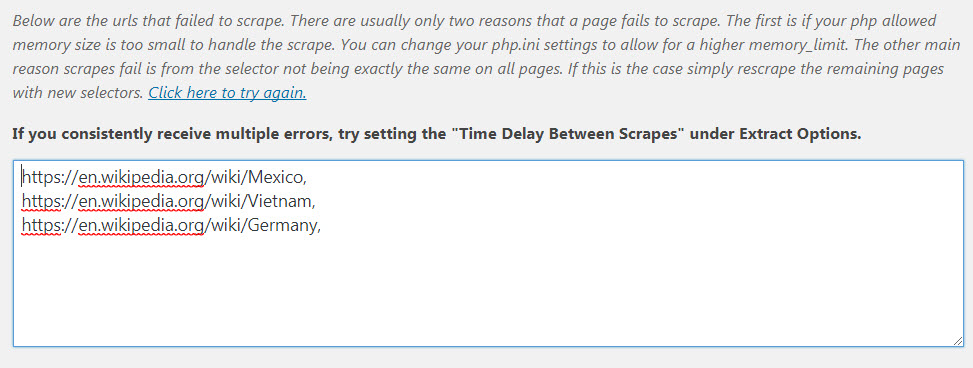
Errors When Scraping
There are usually only two reasons that a page fails to scrape. The first is if your php allowed memory size is too small to handle the scrape. You can change your php.ini settings to allow for a higher memory_limit. The other main reason scrapes fail is from the selector not being exactly the same on all pages. If this is the case simply rescrape the remaining pages with new selectors.
If you consistently receive multiple errors, try increasing the “Time Delay Between Scrapes” under Extract Options.
WP Scraper Pro will supply you with a list of url’s that failed so you can try again.

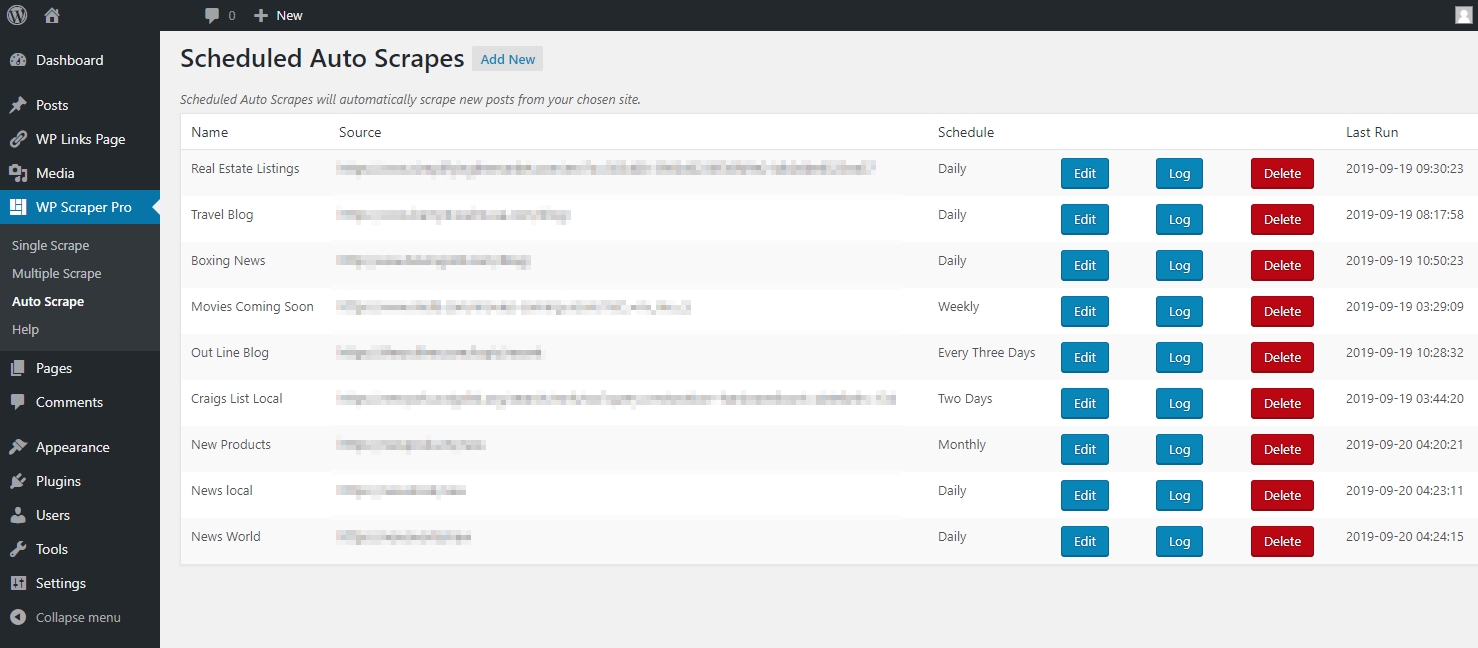
Auto Scrape – Schedule Page
On this page, you can see each Auto Scrape that you have scheduled for your site. You can also add a new Auto Scrape, or edit and delete any saved scrapes from this screen.
Auto Scrape will automatically pull all urls from a source page that you select, and add any new posts into your site.
For example, let’s say you have a blog on wordpress.com and you want each article you add there to automatically be imported into your website.
You can set the Auto Scrape to the homepage of your blog on wordpress.com, which typically shows links to each of your recent articles.
Each time Auto Scrape runs, it will check your blog page and compare it with what has already been imported into your site.
Any new articles will automatically be added into your wordpress website as well.
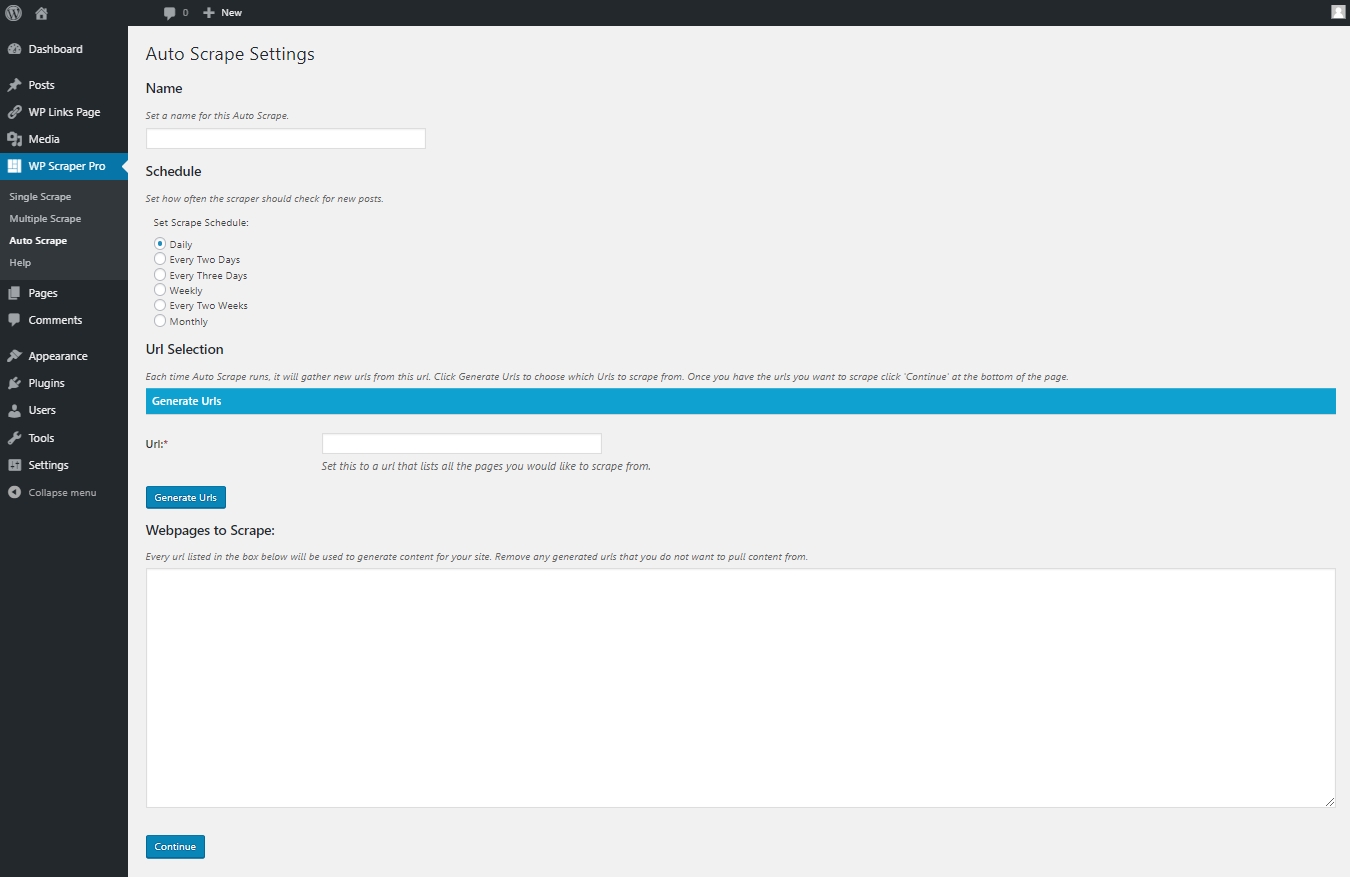
Auto Scrape – Add a New Auto Scrape
*Name
*Set a name for this Auto Scrape to distinguish it from other saved Auto Scrapes.
*Schedule
*Set how often this Auto Scrape will pull new posts into your site..
Url Selection
The visual selector works much in the same way as the Content Selector. The difference is you will only need to select one link to the pages you wish to scrape into your site. The visual selector will then import all similar links into a list for you to use with the auto scraper.
Once you have your first list of Urls to scrape, click Continue at the bottom of the page. You will then be taken to the Add Auto Scraped Posts. This page is similar to the Multiple Scrape Page.
Selecting Content And Options
Content selection and choosing options will be the same as the Multiple Scrape.
*You must select the content from the source page for the scraper to find and add the content to each post. You may set specific Categories, Tags, or a Featured Image for all the Auto Scraped Posts to have, but post title and post content must be selected using the visual selector.
Once you are finished click Create Auto Scrape.
The Auto Scrape will then save, and create your first batch of posts which you selected previously. You will be taken to a page that is similar to the Multiple Scrape Results page. You can see which posts have saved and which haven’t.
Auto Scrape – Log Page
On the Auto Scrape Log Page you can see which Urls have been pulled into your site. Should you ever need to re-import a Url, simply delete if from this page, and if it is linked on your source Url it will be imported again the next time Auto Scrape runs.
This page will also show you the last time your Auto Scrape ran
Only 100 urls will be saved into the log at a time to prevent the log from using large amounts of your server resources when Auto Scrape runs. By keeping this file small in size, Auto Scrape remains a lightweight solution to your Auto Scraping needs.

WP Scraper Pro and WP Live Scraper are intended solely for copying content that is in the public domain or other wise not protected by any copyright laws in any country.
Please obey the copyright laws of the country you are copying content from. Wp Scraper Pro does not assume any sort of legal responsibility or liability for the consequences of coping content that is protected under any copyright law of any country.
For more information about copyright laws please visit http://www.copyright.gov/.